Here is a tour of what I call a miracle bathroom.
Renovating in an old home presents many obstacles.
If you have an endless budget,
anything could be done,
but we were trying to work
around the old house/attic obstacles in a
natural way to keep cost down.
One obvious challenge is the
slanted attic ceiling.
I had to do smaller double doors to
get in just so we would not hit the ceiling.
Then we had to "rehearse" standing at the
toilet for head clearance.
We were also limited on toilet placement to keep it close
to the house plumbing stack.
In this case, we also had to order a special toilet that
is wall mounted rather than the floor.
We had to have a cavity behind
the toilet to hide the plumbing.
We did this because my
contractor did not want to drill
into the floor joists, making the
floor structure not as solid, so the plumbing
sits on top of the floor behind the wall.
From a design standpoint, I added the
granite ledge to make
this feature feel like it was on purpose
...a feature and not hiding something.
Good lighting is so important and added this
sconce that had a
glass shade originally to the toilet side of the bathroom.
I changed to a regular lamp shade...
also was happy.....got this from a
lighting store tent sale for $30
and the shade was $18.
Next we wrap around to a built in bench...
was thinking it could be storage,
but set it up this way and
have kept it like this.
I still have a preschooler
so having a place to
sit rather than the
toilet is nice to have.
I added a bench cushion
...wrapped the foam with fabric
like a present
using safety pins on
the back side
(I can't sew) and some
accent pillows.
You can use duct tape to cover
safety pins if you are
worried they will open
or scratch the surface
Want to replace with a
longer/thicker cushion,
but had this one so using it for now.
Then I had this little cubbie area for storage.
...so added some shelving.
I want to add a little
piece of trim
to the front to hide the little ledge.
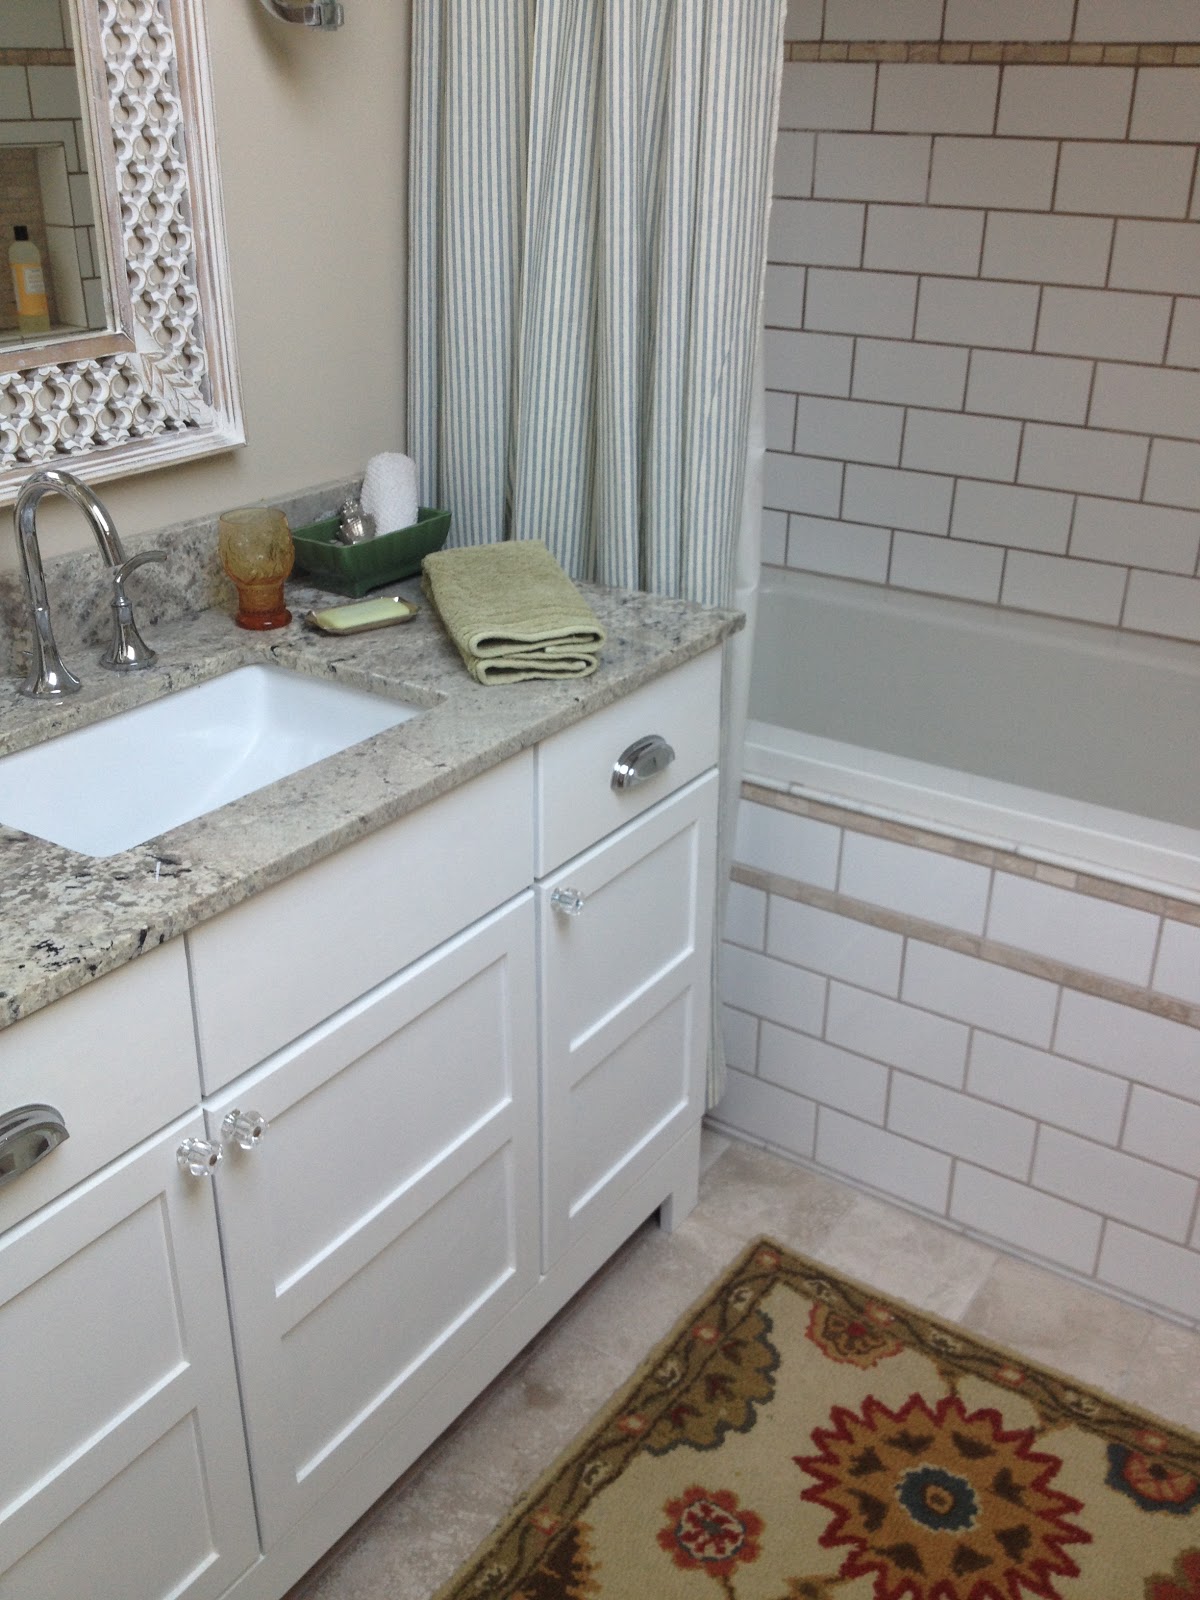
Added a cute towel hook from World Market....
For the tub area, I wanted to do a classic feature found in
bungalows, so did a simple white subway tile
accented by little marble subway tiles.
I had the tiler space the tile so the grout lines would really show up and
then used a darker grout
color found in marble.
(I washed the tub before this photo was taken,
so some of the grout
looking darker in some spots
where the grout is still wet.)
Added a little shampoo niche...
Another obstacle...had to order this jointed shower rod that is
paintable hardware from Germany.
Only thing that would work for a
shower rod with going
into a slanted ceiling.
Less expensive than custom glass shower door which I was thinking I would have to do.
The piece was $12.
Added some sconces on either side of mirror....
Carved mirror from Home Goods....from India
The vanity was from Home Depot
...came in a dark finish
but I painted it white.
Could not find a white finish I liked in my price range.
I always tell my clients to look past the finish if the
size and style is right,
because it is the easiest thing to alter.
Also added different hardware.
Had a custom one priced like this for $900
...paid $325 for this one.
Tried to be subtle but repeated the rectangle
shape in sink, tile, and the
wall sconce near toilet.
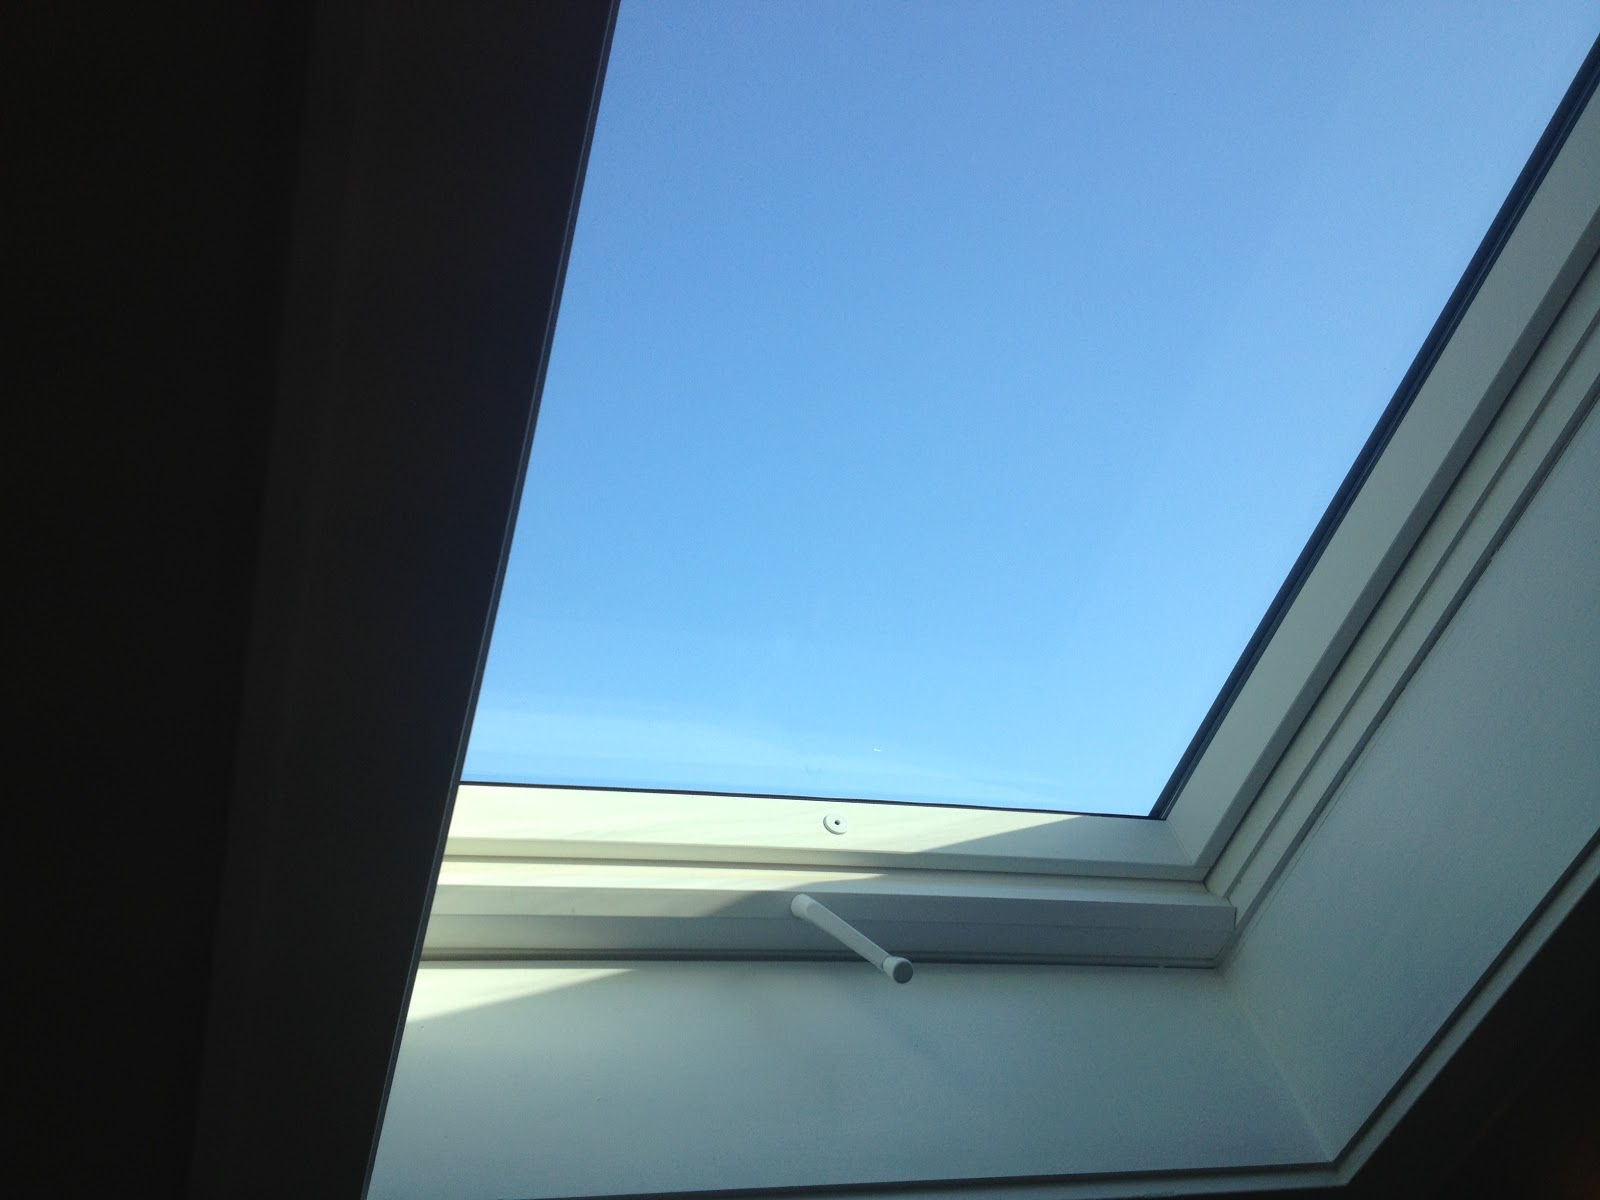
.....Big splurge ....and so worth it was....
this skylight.
You can see how it reflects natural light in the mirror here.
This shows you how I had to use the
double doors to clear the ceiling.
My husband added the stop hinge that
keeps the door from hitting the vanity.
Added this area rug for color and comfort...
Had the tiler put the tiles on a
running bond/brick pattern on floor.
Love this marble!
Found it at The Tile Shop
The walls are a linen color...with all the
in and out of walls and ceiling
being slanted I wanted to
blanket the walls and
ceiling with the same color to keep it simple.
I pulled the color from the tile by
using my paint fan on top of it.
Fell in love with this granite
...a remnant from a fabricator.
Loved how it complimented the tile.
Besides the lighting near mirror and toilet,
I also added a can light to shower area.
Another obstacle was the bath/shower plumbing
...we added a drop in tub
because.... once again..... we have the
plumbing on top of the floor.
Makes the tub a little higher to
get into but still comfortable.
I thought this was a better way to do it rather
than putting the tub on a little platform.
I hope you enjoyed the tour!