Monday, November 28, 2011

Tis the Season...Come Shop!

Getting ready for a Holiday Boutique Sale that will be held at St. Mary's Church in Riverside this Friday, December 2nd from 5-9 PM.  The event is in correlation with the Riverside Holiday Stroll, so the whole town has lots to do for a fun family night.    I am selling vintage and holiday items for your home.   There are many other vendors selling at the event too!  There will be a craft area for kids and goodies to eat.   Please stop by, say hello, and shop.     


Sunday, November 27, 2011

My Living Room

Here is my living room.   When I purchased my home 4 years ago, this room only had one sofa, 2 small chairs and mauve carpeting.  I got out my tape measure and started to space plan because I could see how much I could do with this room.   I have a big family and love to entertain.   I wanted a space that could handle lots of people doing different things and this was it.  This space now has 5 chairs, 2 sofas, and 2 cocktail tables, as well as side tables.
 You see the back of the sofa as you walk in so I added this drop leaf table found at a garage sale in this color that ties in with the color in the lead glass windows.   This is also useful and gets pulled out when entertaining.
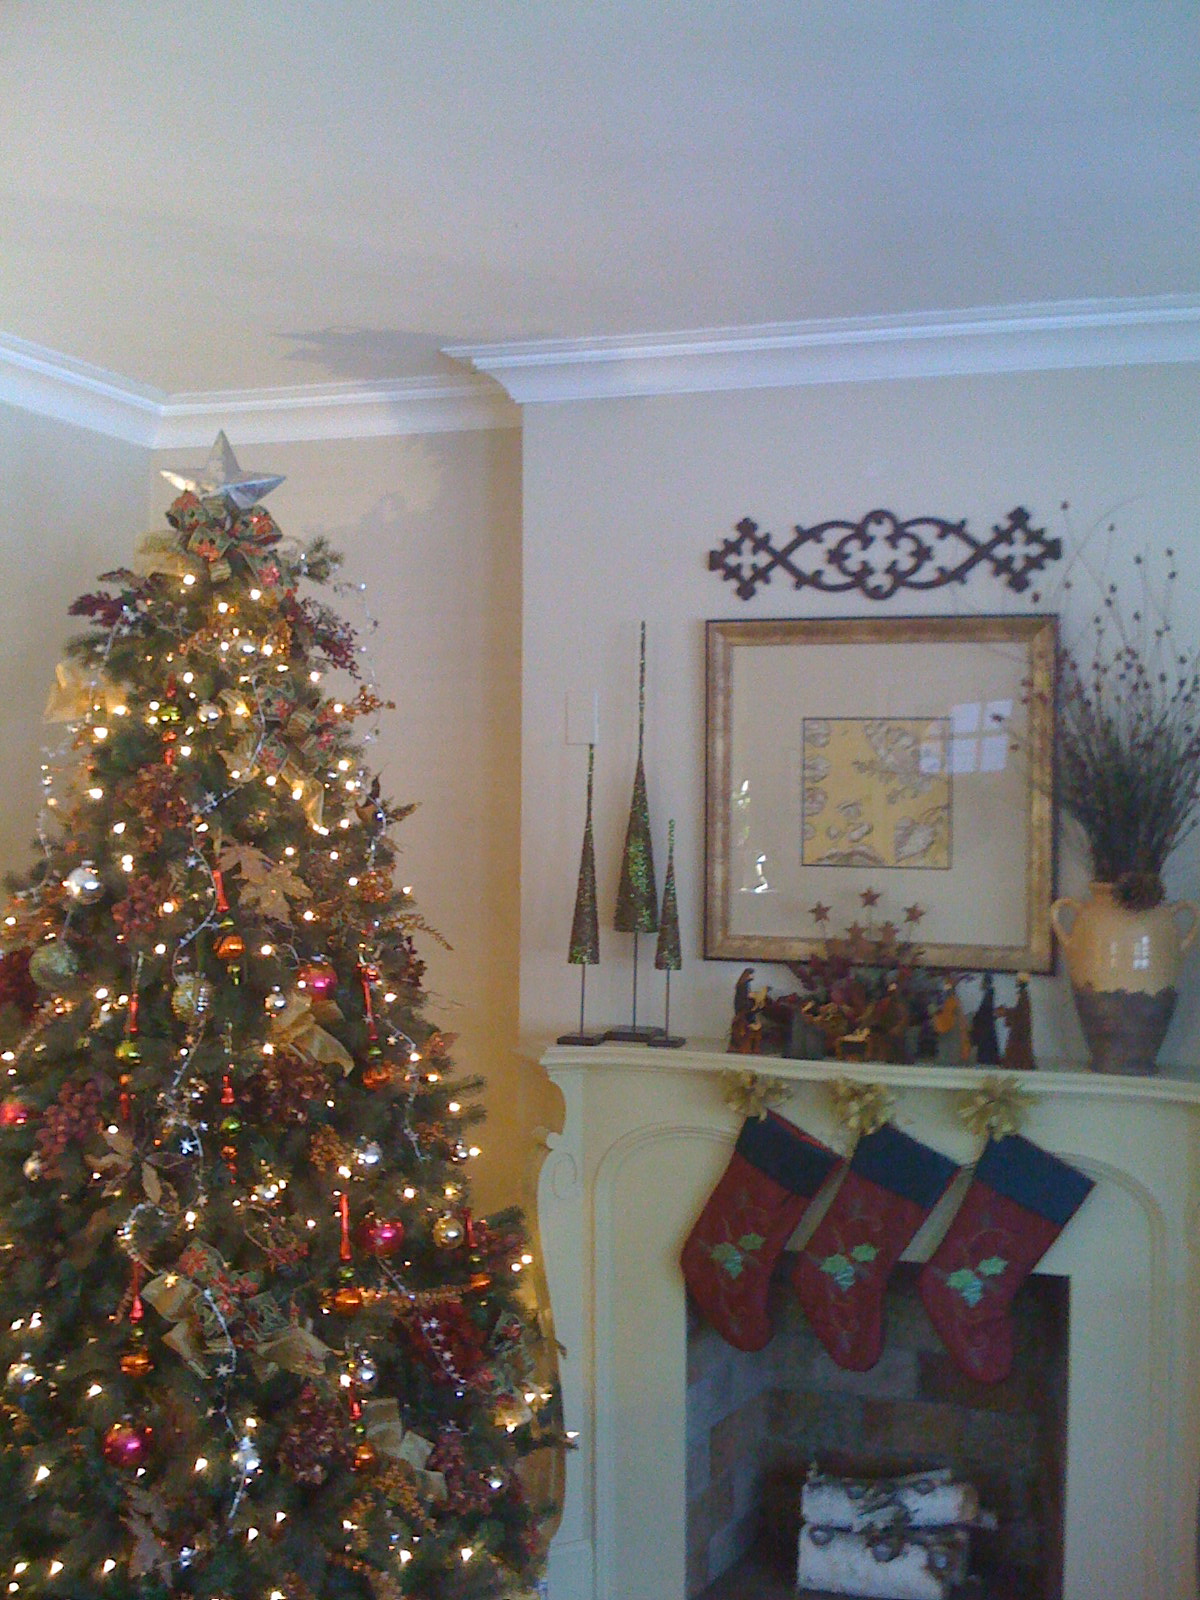
 I was disappointed with this fireplace but have to keep it for now.   I discovered the original blue prints and found that the previous owners changed the original mantle with built in bookcases that went went with the style of my home...a bungalow.  
Until I redo it, I painted and glazed the mantel which was white.  I painted the pink marble surround brown, and I can live with it until I am ready to redo this and make it a working fireplace. 
 I added a mosaic mirror that compliments the lead glass windows and was more contemporary with the gaudy look of the mantel.   I love this mix and tension of styles.

 This is the other half of the living room.   I wanted this area to be a cozy conversation area.  The sofa also faces the television wall, so it is good for family use on movie night. I don't have a family room, so the television is in this space.  The rugs help to define each area.  
 These are the lead glass windows...my art...and the reason I fell in love with my house. 
I kept my furniture plain because I did not want to take away from the windows. I pull the colors from the lead glass throughout the living room through the green accent wall, rust colored drapes, painted furniture, art, pillows and accessories.I stay with various shades of green, orange, and gold.   
 I mixed a vintage chair here with a retro ottoman in the conversation area.  I like how the square shade plays with the squares in the windows.   The shade is on a vintage lamp base...another way to mix things up. 
This room is now a comfortable place for the family to gather, read, watch a movie, or visit with one another.  Mission accomplished!     

Wednesday, November 23, 2011

Fall Vinette

Ready to pull out all the Christmas stuff...so I thought I'd show a little bit of fall decor before I put it away.  This is an area in my dining room that is also the first wall you see when you enter my home.  I change this area the most for the seasonal decorating.   
 I have used a variety of accessories...lamp, vase with twigs for texture, pumpkin and gourds for color, placemat for color and texture, and an old camera for fun.  I also added some vintage round silk and velvet pillows to the side chairs.
 I love to mix metals.   Here I mixed a gold mirror with a pewter/silver vase.   
 I have a bar area in the corner and added a wreath and indian corn.  
Happy Thanksgiving!

Tuesday, November 22, 2011

Redesign / One Day Decorating

Here are some before and after shots of a redesign I did for a client.   A Redesign is all about using your  existing furniture and accessories. My client had lots of great things to work with and treasures we pulled out of closets. My goal was to add some color and tweak some of the issues with space planning.   We worked on a living room, dining room, master bedroom, sitting room and office.   We swapped items from room to room and had some dramatic changes in a short period of time.   

Master Bedroom Reading Area
This area felt like an extra twin bed that had no where to go.   I wanted to make it feel more like a day bed or sofa.   The area is used for reading and relaxing. It lacked color and felt too crowded with the chair in the corner.     
 Here is the after...added pillows and throw for color, untied and spread out drapes, created interest on the wall and made it feel larger by adding more to it, added a table to use for a cup of coffee or book, added basket for storing extra pillows and texture to area.

 This is the other side of the room.  It is a very spacious room but it felt unfinished without using the space between the chair and the armoire.  It can be a balancing act with space planning. You have to know when to add and take away.  You know by moving things around and looking for balance and not crowding a space.
 Here is the after....Added black chest, more color with flowers, red quilt at the foot of the bed, red step stool and accent pillows, covered a chair with a cream quilt, opened drapes and added more light with cute accent lamp.  By filling in the center of the wall, the side of the room had more balance and more storage.    

 One Day Decorating is a great way to use what you own and make a big change to your decor.This is an example of what you can accomplish by using what you own.  So many of us have more things to work with than we realize!  Digging through things and experimenting helps to keep your decor fresh and keeps it interesting for you.

Redesign = Instant Gratification   

Sunday, November 20, 2011

Button Shade

Here is a simple project to try.   I loved a jar of buttons I had out as an accessory in my home.  
I wanted to do something new 
with them though, so I dumped them out and started to fiddle.  I decided to embellish a lamp shade with them. 

  I used an elmer's craft glue to add the buttons to the shade.  I liked mixing the different sizes and colors, but wanted it to remain neutral.  The light also changes the effect and shows off the texture and color of each button.  
It is especially fun to see people approach the shade to figure out what they are looking at.  This idea is something that you can do that will add a unique flare to your decor.

Wednesday, November 16, 2011

Bench Redo

Here is an upholstered bench that needed 
some love....
 I unscrewed the cushion and cut up a chenille polka dotted blanket (It some tears and stains and could not be used on a bed, but was still super cute!)   I laid it out and cut the fabric around enough that I could staple it on the underside of the cushion. 
 Here is the bench without the cushion...
 This shows the underside where I stapled around the edges....
           Step one complete!
                  Test run...
Now to add a few of coats of paint in an eggshell finish....


 Then I added some trim from the blanket in the front of bench....
                                            with my staple gun....
 I did not worry about the edges looking pretty since I knew it would be covered.
                                     (This is to show you the edge of the 
                 blanket where I stole the trim....)
 I distressed the edges with my razor blade and reattached the cushion.
 I put this bench for sale in my space at Jackson Square Mall in LaGrange.
This bench really was transformed and it was fun to see the change happen!!!!   It could be embellished with throw pillows to add color and pattern and tie into someone's decor.  I love the texture of the chenille with the cane material, so it looks great on it's own too. 

Saturday, November 12, 2011

Adding Color with Paint

Here is a beat up wood chest I found at an estate sale.   I loved the long handles and the drawers worked well...always a bonus with older furniture.   I thought it had a lot of potential with a simple fix of fresh paint.   I cleaned it up and lightly sanded the piece and added a few coats of red paint.   
Here is the after:

I distressed the edges with a razor blade to expose the wood below the surface.   I put it in my space at Jackson Square Antique Mall in LaGrange for $85. I am on the lower level...#002 if you ever head over there to shop.   I added some Christmas decor to it in my space and it really looks sharp...almost kept it...occupational hazard!

If I have a client afraid to put a bold color on the wall, this is where I advise them to put it.   Adding a pop of color to a space though accents, window treatments, or small pieces of furniture is what adds interest to any space.  Hope this idea inspires you to look around your own home and see where you can add some color!

Monday, November 7, 2011

Recovered Cornice

These are 2 cornices I picked up at an estate sale.   The pink material did not go with my daughter's bedroom, but I loved the shape and could not resist the $7 price tag. I ordered one yard of material for the 2 cornices.   I cut the material around the cornice turned upside down, and made sure there would be enough to reach around all sides.  I used a staple gun to secure the material.   
 If I ever redecorate her room or move these to another room, I can recover them again and again!

Friday, November 4, 2011

New blogger...

Excited to be a new blogger as of last night!   
It may be messy at first... as I push the wrong buttons and add things I don't mean to, but hopefully I will get the hang of it soon.  
I hope you will see something you want to incorporate into your own home. 

My Dining Room

Thursday, November 3, 2011

Sitting area in dining room

One thing I did here was mix accessories and furniture styles to create some interest. I love the mix of a traditional gold ornate mirror hanging over a rustic distressed painted piece. It works because I continue to mix styles with the rest of the items incorporating the wicker, plates hung in a traditional fashion, rustic lamp, traditional painted chair,and fabrics.

This is an area of my dining room that serves a few functions. Sometimes I clear off the little chest and use it as a bar or a place to put desserts or appetizers. This is also an area where my guest sit and chat. I also like having these chairs handy to pull up to the dining table.

scrapbook paper art


I am addicted to scrap book paper! I wrapped these art canvases with crumpled up scrap book paper and glue and spray painted a coat of polyurethane to give them a high polish look. I saw an artist that had something similar at a high end art fair and was selling them for $48 each. The paper cost me 50 cents a sheet and the total cost for each canvas was $4. There are so many beautiful papers so the options are endless.

Custom Mural painted by Jennifer Rizzo


This is a mural painted by Jennifer Rizzo in my son's bedroom. I hung a metal monkey off of the branch to give a 3D effect. I waited for my son to notice and he got a kick out of it. These types of little details are what makes a home fun and unique.

Master Bedroom


This is a photo from my master bedroom. I always start with bedding when doing a bedroom space. I chose this white cotton duvet with a green embroidery of leaves that are simple. The metal leaves over the bed add dimension and tie into the leaves on the bed. I used a color called lenox tan by ben moore...a color I have used over the years in client's homes. It is a nice warm neutral to work with.

My Living Room

My Kitchen

These are napkins used as window treatments.